Friday, December 28, 2012

Darling Diva Haul: Part Three - Pastel Glitter

These are the last two of the six Darling Diva polishes I got, although I'm guessing they won't be the last since I absolutely love them and will be ordering again from her soon!

The first swatch is Channeling Coco, a soft milky pink creme with medium pink hex and small black glitters. The description on her Etsy store clearly says it's not a "glitter bomb", but I was very happy with what I ended up with after three coats.


The second swatch was Unicorn Bath, which I was really looking forward to wearing. A light blue glitter franken with silver holo, blue and white hex glitter, and pink flash. I layered a coat over a single coat of Essence Colour & Go Let's Get Lost a rich blue creme with a hint of green in it. I got good opacity with one coat of the Essence and loved how Unicorn Bath amped it up. 


I also really like how this photo shows off the beautiful, subtle shimmer of the pink flash on my ring and pinky finger when the light hits it. Such a fun polish!

For all looks I began with a coat of CND Stickey Base Coat and topped it with a coat of Seche Vite.

I hope you enjoyed my first (and long overdue) adventure with indie polishes!


I'll definitely be having more fun with these beauties and will post pictures with my favorite looks as I do. Thanks for visiting!

Thursday, December 27, 2012

Darling Diva Haul: Part Two - Colorful Glitter

I've had so much fun playing with the Darling Diva polishes since I got them! The two I'm swatching today were added in as surprises in addition to the four I purchased.

The first is Witchy Woman, a sheer black jelly base with multi-colored rainbow glitters and a generous addition of blue holo glitters.

The Etsy page featuring Witchy Woman says it's "so much prettier in real life", and I'd have to agree...


I layered one coat of Witchy Woman over Catrice Jade Is Not My Name, and I think they worked very nicely together. I also really liked that Witchy Woman applied very smoothly and easily, with the glitter distributing well without more than a good roll of the bottle before polishing.

The second polish I'm swatching in this post is Apple Crisp, which has green, red, and brown/copper glitters in a clear base. I was really intrigued when I saw it's vanilla scented!


I applied one coat of Apple Crisp over two coats of OPI Don't Pretzel My Buttons from the Germany Collection. It applied a bit less easily than Witchy Woman, but only because of the large red hex glitter that I had to fish for and place on a couple of fingers. Still, it was easier to apply than most other polishes I've tried with large glitters in them.

And my fingertips did indeed have a yummy vanilla bakeshop smell for the 2 and a half days I had this polish on, even with a topcoat of Seche Vite.

Thanks for visiting!

Tuesday, December 25, 2012

Darling Diva Haul: Part One - Drop Dead Sexy Glitter

So maybe it's a bit late in the game for me, but I finally decided to take the plunge into indie polishes. Turns out not a lot of them ship to Germany (apparently most are located in the U.S.), including Etsy sellers, and if they do the shipping costs can be as much as the polishes themselves!

Among the first indie polishes on Etsy that caught my eye was Darling Diva. Since shipping rates would be lower if I got a few bottles, I decided she'd be my first indie polish buy. With almost 60 different polishes to choose from in her store, it was tough to narrow it down to a few choices.

Turns out my mistake was that I didn't buy more!

Of the 6 bottles chosen, I decided to do three blog posts with 2 polishes at a time, because I was just blown away by them. So let's get right to the pictures...

I took so many! I was mesmerized by how these swatches looked in person and the ones in this post were my favorites. I so wanted to really capture the depth and shine these polishes radiate.

The first polish I swatched was ELECTRIC SEX (all caps via Darling Diva) a juicy black jelly base loaded with big gold holographic hexes, gold hexes, gold squares and (the part I was looking forward to most) gold holo bar glitter!

I figured it would make a great topcoat but I really wanted to see it on its own, and got a great result from three thin coats.


Very nice coverage, but still sheer enough that you could tell it was a yummy jelly polish polish that looked amazing with the glitters layered.


The second polish I swatched was Auld Lang Syne, a mix of silver and gold micro glitter, glitter powder, and just the right amount of gold hex medium glitters thrown in for fun in a clear base.

I played around with this one a bit until I settled on a gradient.


For the background color, I used two coats of Catrice Drama Queen, a black with gold powder to make the blending of the gradient smoother. Then I lightly dabbed on a very thin coat of Auld Lang Syne about 2/3 of the way up my nail, then a bit more dabbed on about halfway after I'd already done a round on both hands, and I went a little crazy at the bottom, going for a few of those precious medium gold hex bits on the bottom 1/4 to really amp up the drama. 


I loved it so much I wore it for a few days, including to a Christmas party where I got loads of compliments.

I began both looks with my usual base coat of CND Stickey. I also have to add that while these Darling Diva polishes are smoother than quite a few other glitter polishes I've used and were both easy formulas to work with and apply (just make sure to give 'em a good shake and roll in case the glitter particles settle a bit!) a thick topcoat like Seche Vite not only smooths out but gives these already show-stopping polishes that much more of a wow factor. 

I'll be swatching the other four over the coming week, so stay tuned...

Thanks for visiting!


Thursday, December 13, 2012

Glitter haul and swatches!

This is my first "haul" post, and it was sort of unplanned. Funny how things happen sometimes.

A few weeks ago I got a mini bottle of ANNY Timeless Love, a blue glitter that I thought would make a good topcoat. Today I decided to try it out. So I applied two coats of a light base color, then started to apply Timeless Love...and it's NOT a topcoat.

It was even better!

Tuesday, December 11, 2012

Beige doesn't have to be boring

It's definitely winter here in Germany. The last few days have left Bavaria blanketed in a fairy tale-like snowfall and it's just beautiful. However, the days are getting shorter and as pretty as the snow is, I've never been a fan of the cold. So you'd think I'd go running to my bright and glittery polishes to perk things up a bit, right? Hmmmm, well, not today...

The polishes I'm swatching in this post remind me of a thick and cozy cashmere sweater. And they show that, yes, beige definitely doesn't have to be boring.

The first swatch is ANNY Stardust. I've posted before about how much I love ANNY polishes, and this one is no exception. Super easy to apply, and no streakiness at all. For this photo I used two coats over a coat of CND Stickey Base Coat and finished the look with a coat of Seche Vite.


It has a very fine and subtle micro shimmer which gives it a bit more dimension. It's an easy everyday look and also good if you work in a conservative workplace (or have an interview coming up!) and would like to wear polish.

The next swatches are of Catrice Cosmetics Steel My Soul, which bills itself as having a "brushed metal finish". It's sort of like a semi-matte.

I like Catrice polishes because they offer a good product and great colors at a low price point, but this one was hard to work with. When I first tried it the formula was thicker than usual and hard to work with. I added a drop of thinner which made it easier to apply, but it might have affected the finish.


Catrice Cosmetics Steel My Soul, without topcoat

In the above photo I applied only one coat over CND Stickey Base Coat. I think it's pretty good opacity for just one coat, which I liked. Adding a topcoat means you lose the "brushed metal effect", as the next swatch shows...


For this photo I stamped my ring finger using Konad Special Polish in Black with a lacy pattern from XL stamping plate D. You can see the topcoat gives it more shine and dimension and it's a good background color for stamping.

While I'll keep the bottle and probably use it again, I was disappointed with this particular formula and won't likely be buying any "brushed metal finish" Catrice polishes again. I wanted to like this one very much, the color looks beautiful in the bottle, but even with the thinner I added the consistency just wasn't easy to work with and I thought if I added any more thinner then it would be streaky.

The last swatch is OPI Don't Pretzel My Buttons!, a creme polish from the Germany Collection. For this photo I stamped my ring finger nail with a pattern from XL stamping plate B. I used two coats over CND Stickey Base Coat and it applied very easily. I finished the look with a coat of Seche Vite.


Thanks for visiting!


Wednesday, September 12, 2012

Mid-week quickie: Catrice Blues Brother Vol. II

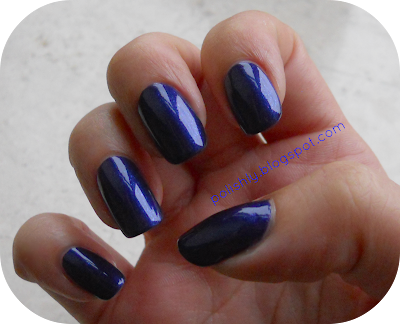
For this Mid-Week Quickie, I started with a coat of CND Stickey Base Coat. I then applied two coats of Catrice Cosmetics Blues Brother Vol. II, a deep cobalt blue with fine glitter. It photographed better than I thought it would! I then applied a coat of Seche Vite to finish.

It's a good color on its own, but it really pops with a good topcoat.


Thanks for visiting!

Sunday, September 9, 2012

One stamping pattern, three different looks

I was really excited about this post because it's the first one on Polishly that shows off one of my favorite things about nail stamping: versatility!

I started off with this pattern from my XL stamping plate A. It's the pattern on the top left corner of the plate.


I wanted the first look I created to be have some sparkle. 


I'd say it was successful ;-)


I used CND Stickey Base Coat and Seche Vite top coat for all three looks in this post.

For the first photoset, I applied two coats of Catrice Cosmetics Jade Is Not My Name, a light green creme. I got this polish on sale (it was just  €1.75, and Catrice polishes are already nearly always under the €3 price point anyway) and I'd had it for almost two months before I used it for the first time with this look. It photographs bluer than it is. To be perfectly honest, I don't like it on its own at all. It might be good for Halloween, but by itself it made my skin look sickly. But I gave it a shot because I figured like the other green shades I had, it would look really good with gold. I was pretty happy with how it turned out!

I stamped the pattern with a generic gold stamping polish. 

The next look was the first one I tried when I got XL stamping plate A last spring, and it's still one of my favorites. 


I applied two coats of Catrice Cosmetics Birdy Reloaded, a sunny yellow with a subtle hint of shimmer. Although I usually really like Catrice polishes because they have a wide range of colors, are really affordable and usually apply well, this shade had a little bit of streakiness to it. It didn't matter in this case though, since you can't tell with the stamping on top.

The pattern was stamped with red creme Konad Special Polish.


For the third and last look, I applied two coats of Essie Smokin' Hot, a dark purple/mauve creme. I stamped it with black shimmer Konad Special polish. 


I wanted to try something different with this look, so I applied Essence Matt topcoat over all nails except my ring finger, which I left glossy both as an accent nail and to show contrast.


The pattern is definitely more subtle here because there's less contrast, but there's still enough to make it wearable. I think it's also a great look for autumn!

A few things to keep in mind if you try this out...

With dark stamping polishes, you might still end up with a little bit of polish around your cuticles right after, even if you tidy up with a brush like I do. You can put tape around the outside of the nail to keep if from getting on the rest of your fingertip, but that won't keep it off the cuticle (at least not without affecting how your nails look). I find that cleaning the polish off your fingers with a cotton swab soaked in acetone is faster than putting tape all around your fingers and then removing it, but that's my preference.

Also, I highly recommend if you try these looks matt to put a coat of Seche Vite on first. Why? Because the thicker formula of Seche Vite helps keep the delicate stamped pattern from smearing. Even after fully dried, other topcoats I've used will smudge the pattern at some point, even if I'm being really careful. Matt topcoats on their own also tend to smudge nail art.


So which one's your favorite? 

Thanks for visiting!


Thursday, September 6, 2012

Snakeskin print stamped nails

I admittedly thought about a few potential puns for this one, but I'll spare you the gory details. I did, however, include stamping plate info with this post (including pics!), since it was asked on the Polishly Instagram and I'd been wanting to add it for a while.

As for the nails...this is a great look to try if you're new to nail stamping. As long as you have the basic technique down (I'm working on a tutorial video), it doesn't matter if you're really exact with where you place the stamp on your nail. Since snake prints tend to be pretty random in nature, I think it actually looks a lot better in this case if it's not too perfect.


See what I mean? 


The variation in the patterns and how they're placed?


To create this look, I started with a coat of CND Stickey Base Coat.

I then applied two coats of Essence Cosmetics Colour & Go "Wanna Say Hello", a dark brown creme.

I then stamped on the snakeskin pattern with a generic gold stamping polish.

I finished with a coat of Seche Vite topcoat.

Now, for the stamping plates...

They're available from MagnoNails.de or Amazon. Cheeky apparently manufactures them, although there's no name imprinted on the plate. If you search "XL Stamping Plate" on Amazon, you'll see the ones I've used for this and other full nail stamps.

Don't mind the reflection from my lamp ;-)
This one is plate "D".


I used a combination of these three patterns on my nails.

As you can see, the edges are curved, which is great if you want to just stamp a pattern on your nail tips, but you can also cover a full nail more easily than with Konad full nail patterns.


Above is a closeup of XL Stamping plate B (recognize the pattern from the Meghan Draper Mani?) next to Konad plate M83. You can see it covers a lot more of the nail, which is great for me, since the Konad plates usually don't cover my thumbnail, and my hands and nails aren't very big at all.

I also used a pattern from plate B for the Medici Manicure.

I hope this is helpful info in case any of you would like to recreate these looks at home on your own.

Thanks for visiting!

Tuesday, September 4, 2012

Mid-week quickie

I've been so busy the last week with the start of school again! The kids in my class have been trickling in for their second and last year with me, and before that I spent two days setting up my classroom. That included A LOT of lifting. Meanwhile after school I've been preparing materials and projects for my class, writing up our monthly newsletter...anyone who thinks teaching Kindergarten is just singing the "Itsy Bitsy Spider" and coloring should probably try it for a day ;-)

But, as much as I do love my job and the kids in my class, all that hasn't left me with much time for a proper manicure.

However, this afternoon I played around with an ANNY polish I got recently.


To create this look, I started with a coat of Essie Protein Base Coat.

I then painted on two coats of ANNY One and Only, a smoky lavender creme. The bottle I'm holding in the photo is one of their minis, which I really like because they're sold individually and not in sets, so you can get a smaller bottle of a color you want to experiment with or that you know you won't use too often, but without committing to buying or storing a full-size bottle.

I added a coat of Catrice A Million Styles in Have an Ice Day (can you tell how much I love that topcoat?) for the ring finger accent nail.

I then applied one coat of Essie To Dry For as a topcoat.

The Essie base and topcoats aren't my favorites, even though I have them. I still love the staying power CND Stickey Base Coat gives me and the shine, protection and quick but thorough drying I get from Seche Vite. But I'm guessing I'll change this polish in another day or two, and the Essie base and top coats should be fine until then.

I'm looking forward to trying more looks with this shade. It's a softer color than it photographs as, not quite as dark. And like all the ANNY polishes I've tried it has a great formula and applies easily.

Thanks for visiting!

Monday, August 27, 2012

I'm Puzzled!

I really have to stop with these awful puns, I know. But unfortunately posts have to be titled and titles have never been my forté. So lets continue on to something I think I'm a little better at...nails!


I start work again this week, and this look was a favorite of my kindergarteners last year. I got lots of "ooooh's" and "aaaaah's" over it from them, but I got plenty of compliments from grownups on it too!

To create this look, I started with one coat of CND Stickey base coat.
The deeper blue base color is two coats of Catrice Cosmetics Blue Cara Ciao (what a mouthful!), a versatile blue creme.

Catrice Cosmetics Blue Cara Ciao

I stamped the puzzle pattern using baby blue Konad Special Polish.

I finished with one coat of Seche Vite top coat.

I really like how the baby blue stamped pattern complement the deeper blue of the base polish. It's a good example of how complementary colors can sometimes be used for stamping and still have a "pop"; you don't always need sharp contrast to make your look stand out.


Thanks for visiting!


Friday, August 24, 2012

Fishnet Tips

This is one of the first looks I tried out when I began nail stamping about a year ago, and it's still one of my favorites. Sexy, fun, but not over the top. I used Konad stampling plate M45 for the fishnet pattern on my tips.


To create this look, I started with a coat of CND Stickey Base Coat.

The base color is two coats of Essie Overnight, which has been discontinued, but any pale, sheer color would work for this. 

To stamp the tips I used black Konad Special Polish.

I finished with a coat of Seche Vite.

Thanks for visiting!

Tuesday, August 21, 2012

Medici Manicure Stamped Nails

I've been on vacation for the past few weeks, so apologies for the lack of posts, but after all that relaxation (and amazing food and wine!) in gorgeous Tuscany, I was ready to indulge in one of my favorite comforts at home...doing my nails, of course!

I call this the Medici Manicure because Tuscany exploded in growth during the Renaissance. The Medici Family ruled the region and their power, money and influence not only reached to surrounding countries such as France, but also helped to fund some of the greatest artworks known to humankind through their generous patronage of the arts. Their palaces were numerous and, as one can imagine, very opulent.

My inspiration was this portrait of Catherine de Medici, who was born in Florence but went on to become Queen of France as wife of King Henry II. While her politics are still controversial, there's little doubt that she was a fabulous dresser back in her day.

Catherine de Medici as a young woman


The pattern of this stamped mani is inspired by the luxurious fabric and print of Catherine's gown, and the cream background tones down the gold a bit.


To create this look I started with a coat of CND Stickey.

The base color was two coats of Essie Case Study.

I used a no-name gold stamping polish for the pattern.

I sealed it in with one coat of Seche Vite topcoat.


I hope you enjoyed the manicure and the short history lesson that went along with it. Thanks for visiting!


Wednesday, August 1, 2012

Glitter Topcoats - Part Two

For the second post on glitter topcoats I chose Catrice Cosmetics A Million Styles in Shake It! Flake It! This is a holo flake topcoat and they've been getting really popular, along with holo polishes.

I again chose a selection of different kinds of base colors to highlight the versatility of topcoats and the effects they can have.

For both photo sets, clockwise from top left: Essie Master Plan, ANNY Green Racing Drag, Essence Colour and Go Quick Drying Nail Polish in Camouflage, Essie PoppyRazzi Collection in Lights.

Before topcoat...

And here are the same colors with one coat of Shake It! Flake It!

Topped with holo flaky yumminess!

I was expecting more of an effect with the Master Plan and Lights, but I really loved how Shake It! Flake It! looked on the darker colors, especially the ANNY Green Racing Drag. It also brightened the Essence Camouflage beautifully, making it look less grey and drab.

Essence polishes are available in many European drugstores, but you can buy them in the US via Ulta.com

Thanks for visiting!


Monday, July 23, 2012

Glitter topcoats - Part One

So I decided to do a short series on glitter topcoats and why I think they're so awesome. Probably the most obvious reason is versatility. You can turn a more sedate creme polish into a much more eye-catching look with just one coat. It's almost like doubling your collection of polishes with that extra bottle of topcoat!

The glitter topcoat I'm using in today's post is the same one I used on my ring finger accent nail in my previous post, Catrice Cosmetics A Million Styles in Have An Ice Day.

To show a few of the possibilities, I chose (clockwise from top left for all photo sets): Essie - Bikini So Teeny (a pastel), Essie - Sand Tropez (a muted neutral), Catrice Cosmetics - Caught on the Red Carpet (a classic starlet red), Chanel - Vendetta (a dark, vampy color; one coat).

So here's what I started with...

Just polish, no topcoat.

Nice enough colors on their own, right? Now these are the same colors coming up in the next group of photos, with one coat of Have An Ice Day, taken in regular indoor lighting.

Oooooh, glitter!
The topcoat definitely amps up the polishes and they take on a beautiful, fine particle glitter. 

But hang on, it gets better! 

In my previous post I wrote about how in direct sunlight Have An Ice Day takes on a fiery, prismatic shine. There haven't been too many sunny days in Munich recently, but the bright halogen bulbs in our entryway provide a pretty close comparison in the next set of pictures.
WOOOOOOOW, glitter!!!!!
Pretty cool, right? Even still photos don't fully do it justice; it looks gorgeous in motion. That's part of why the photos in the last set all look a bit different from each other, since I was moving my hand around trying to get a photo that captured the light best.

I've worn this topcoat with Bikini So Teeny twice (once on all fingers, the second time with one glitter accent nail) and really liked it, but I was really happy with how it turned out on the Vendetta. It almost looks like a photo of some of the "nebula" nail art photos I've seen, but not nearly as time-intensive!

A topcoat like this would be great not only for evening, but would also be fantastic for a daytime wedding outdoors. Bikini So Teeny could be a cute and easy "something blue"and the Sand Tropez or a similar neutral would be just muted enough even with the glitter to still be festive but not too distracting.

Now go out and grab yourself a bottle of glitter topcoat and start having some fun!

Thanks for visiting!

Friday, July 20, 2012

Orange you glad you got this polish?

Ok, that was an awful pun. I admit it. But I guess summer makes me a little goofy sometimes. All the heat.

Speaking of summer, I'd been looking for a juicy orange polish and picked up a bottle of Catrice Cosmetics Exotica, a limited edition color from their Coolibri range.

My collection of Catrice polishes keeps growing, since they're about three Euros a bottle, they make a ton of great colors and the polish itself is usually very good. The photos I took were three days after I first painted them, and there's almost no wear, including on the tips.

Right hand with glittery ring finger accent nail ;-)

To create this look, I started with my usual one coat of CND Stickey Base Coat.

I then added two coats of Exotica. It has a very fine shimmer in it and applies well with no streaking. The glitter accent nail was one coat of Catrice's A Million Styles Effect Top Coat in Have an Ice Day. I'll do a separate post on that soon because it's probably the most fun glitter top coat I've used. It looks nice here, but in direct sunlight you see this crazy awesome, almost holographic blast of sparkle.

I topped it all off with a coat of Seche Vite topcoat.

Aaaaaand here's the left hand.

Thanks for visiting!

Sunday, June 24, 2012

Mint Green and Gold

I love the color combination of mint green and gold. There's something about it that conveys a discreet sophistication to me. It might have to do with my boundless adoration for Ladurée, the French pastry shop that I fell in love with on one my earlier trips to Paris. Every trip I've made back since then, I've stopped by for a box of their macaroons. If you think, as I once did, that macaroons are always these crumbly, dry hockey pucks that taste like tanning lotion smells (coconut and, well, who knows what else...) there's a whole other world out there.

The macaroons at Ladurée are light little merengue jewels, with flavors as varied as dark chocolate, rose (yes, they really taste like roses smell!), blackberry, pistachio and a vanilla that's far from boring.


Image Credit: letartinegourmand.com


So notice the packaging behind those little sweet morsels of heaven? Mint green and gold are Ladurée's signature colors. When I bought a bottle of Essie's Navigate Her I knew the shade reminded me of something I really liked, although at first I couldn't quite remember what. Then once I got it home and played with it a bit I whipped this up:


To create this look, I started with my usual coat of CND Stickey Base Coat.  

I then applied two coats of Essie Navigate Her, the mint green background color.
I stamped the wave pattern using a generic gold stamping polish.
I finished off this manicure by using Essence Matt topcoat to mute the effect a bit.


Thanks for visiting!

Sunday, May 20, 2012

The Megan Draper Mani

I'm a huge fan of "Mad Men". Have been since the first season. While playing with a beautiful new green ANNY polish I got a few days ago I did this stamped mani.


So why am I calling it the Megan Draper Mani? The deep green creme polish stamped with a shimmering gold in a somewhat Mod pattern that likely would have been popular in the second half of the 60's is a look the young and fashion-forward new Mrs. Draper could appreciate. I like to think it's perhaps how she would've done her nails when she sang "Zou Bisou Bisou" to her husband at his birthday party...if nail stamping was around in 1966, of course.

For this look, I started off with a coat of CND Stickey Base Coat and applied two coats of ANNY Green Racing Drag. The ANNY polishes, by the way, are fantastic. Huge range of shades, highly pigmented and they apply like silk. I also have very few tipwear issues with their colors.

I then used a no-name generic gold stamping polish to stamp the full nail design shown.

I finished up by sealing it with a coat of Seche Vite top coat.

Thanks for visiting!


Friday, May 18, 2012

First Manicure Post!

Ever since I discovered nail stamping almost a year ago, I've just completely fallen in love with it. I love what seems to be an endless range of color combinations and designs you can play with on those ten little canvases that are literally right at your fingertips.

To create this look, I started with CND Stickey Base Coat, then applied two coats of Chanel Vendetta (a very dark bluish purple with a subtle fine shimmer) for the background color.

For the stamping polish, I used Essence Silver Stampy Polish on an XL nail plate and chose the full nail design you see in the photo.

I then sealed it with a coat of Seche Vite top coat.

The design reminds me in some ways of traditional Japanese woodcuts or textiles.

Thanks for visiting!

Hello and Welcome!

After months of thinking about it, hemming and hawing, and lots of encouragement from friends and loved ones, here is my humble little nail blog.

I hope to update regularly and look forward to your visits!